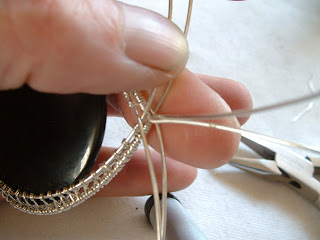
I left off with finishing the weave that cages the focal piece. Let's tighten that weave up by gently pinching the double coils along each of the frames. This will help even out the spacing between the coils.
Bail and Embellishments
1. Remove the tape (or clamps) clean any tape residue.
2.Bend the two center wires straight up at the 'V; junction
3.With the front of the piece facing you, bend the front center wire toward you so it's now at a 90 degree angle from the piece.
4. Coil that wire around the base of the standing wire3 times. Snip, and tuck. You might have to file the end to smooth .
5. measure to four side tails to the same length, mark and snip so they are all the same.
6. Using the tip of your round nose pliers make a tiny loop facing downwards in the end of each of the 4 tails.
7. to form the swirl hold the loop (gently) in your chain/bent nose pliers and bend the wire around. Don't use the pliers to move the swirl (might leave marks) use the pliers only to hold, and use your fingers to bend. Finish all 4 swirls, and push to place them where you want them.
8.To make the bail for the chain, bend the last standing wire towards you at a 90 degree angle at the base of the coil. grasp that point with your round nose pliers and wrap the wire away from you to form the loop.
9. Keep holding the loop with the pliers and coil that tail around the top of the other coil once.Use the chain or bent nose pliers to pinch all 4 coils together. Then we are going to make another swirl with that tail, and push it down on the front in front of the coil on the bail.
So now what to you do with an UGLY spot? Small scratch/chip/weird drill spot on the focal? You can cover with further embellishments. Personally I won't sell this piece because the of the (big) ugly spot, but it was handy to use for this tutorial. To cover the ugly spot I made an 'S' shape swirl. Same process as above. Cut a 4 inch piece of the 20g wire and make the small loops at each end. One pointed up one pointed down. Then I loosened the very outer row on each swirl to be able to use the 24g wire to wrap it to the inner frame to cover the ugly spot. I did 3 wraps around each connection point, and snipped and tucked the ends.
Okay guys, that's it! :) If you try this out I would love to see your versions. Feel free to post pics on my facebook page or link here in the comments. I would love any feedback or questions you may have. Good luck!
Bright Creative Blessings, Theresa ♥


